Custom Spotify API Client Configuration Tutorial
Benefits from customising Spotify API Client
Section titled “Benefits from customising Spotify API Client”Spotify API won’t affect you by returning 429 Error anymore.
Requirements
Section titled “Requirements”Using a Custom API Client requires Spotify Premium.
Users who previously completed the configuration will also be required to have Spotify Premium starting March 9, 2026. Otherwise, the Custom API Client will no longer function.
If you do not have Spotify Premium yourself, but can borrow a Client created by a friend, you may also configure Lyricify in that way.
See Borrowing a Friend’s Client Information below for details.
Preparations
Section titled “Preparations”If you have already completed the preparation steps, you can directly use the previously obtained Client ID and Client Secret in Works on Lyricify Mobile part.
- Login to Spotify in your browser, if you have already logged in, go to step 2.
- Open Spotify Developer Dashboard, if this is your first navigation to this website, you will need to agree with Spotify Developer Terms. Just check
I accept the Spotify Developer Terms of Serviceand clickAccept the terms.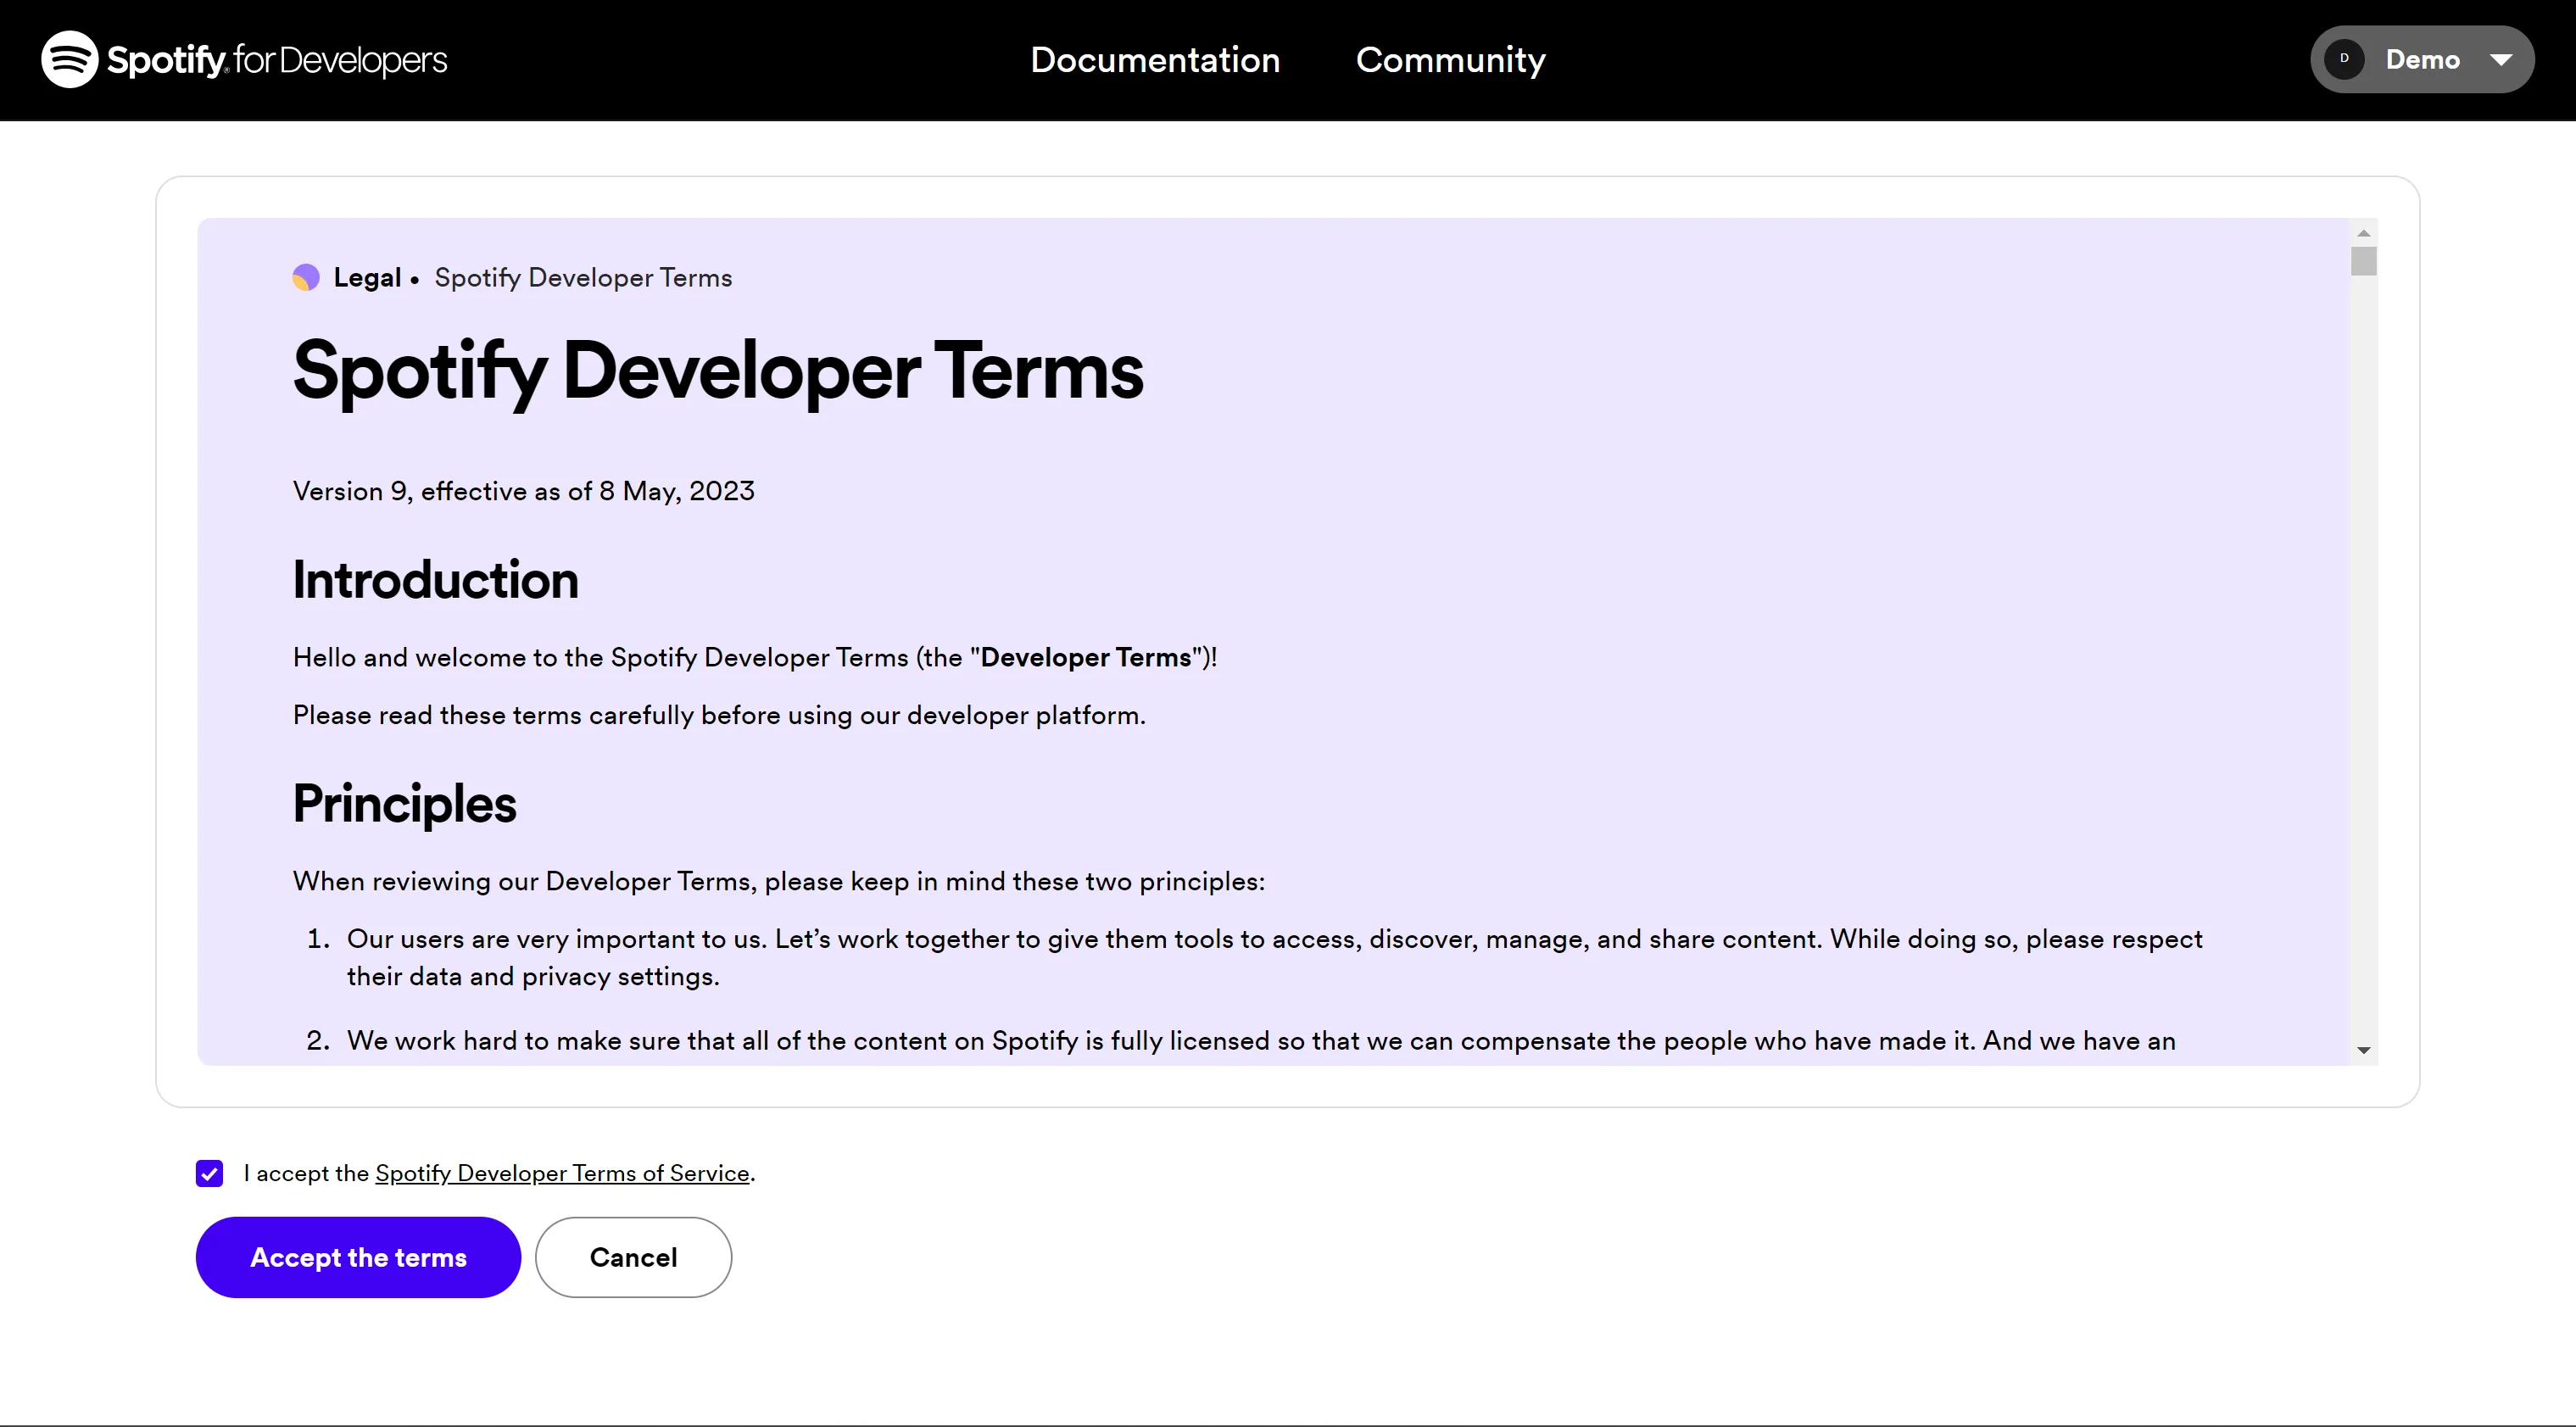
- Click
Create appin Dashboard’s right top corner.
If you are prompted withYou need to verify your email address before you can create an app., you need to verify your email address first.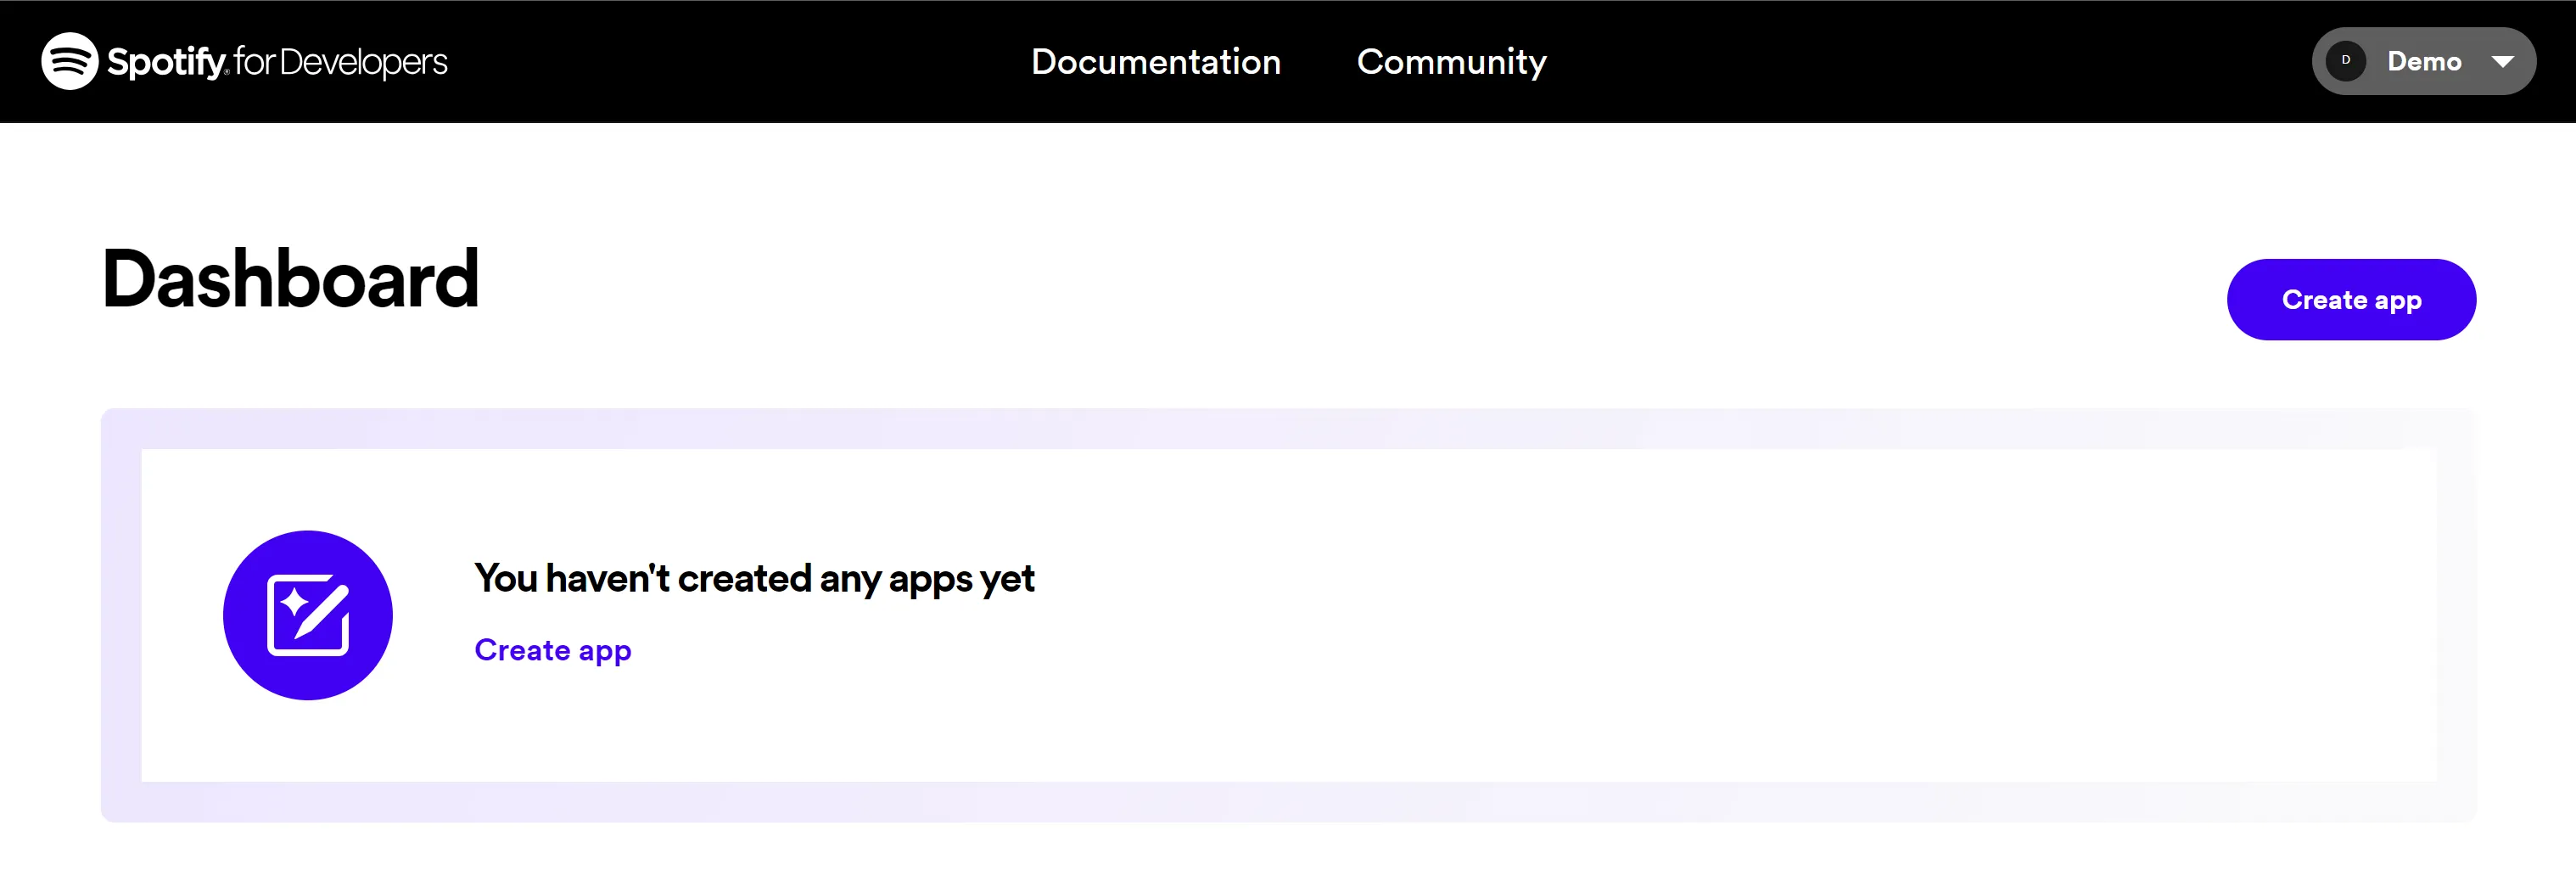
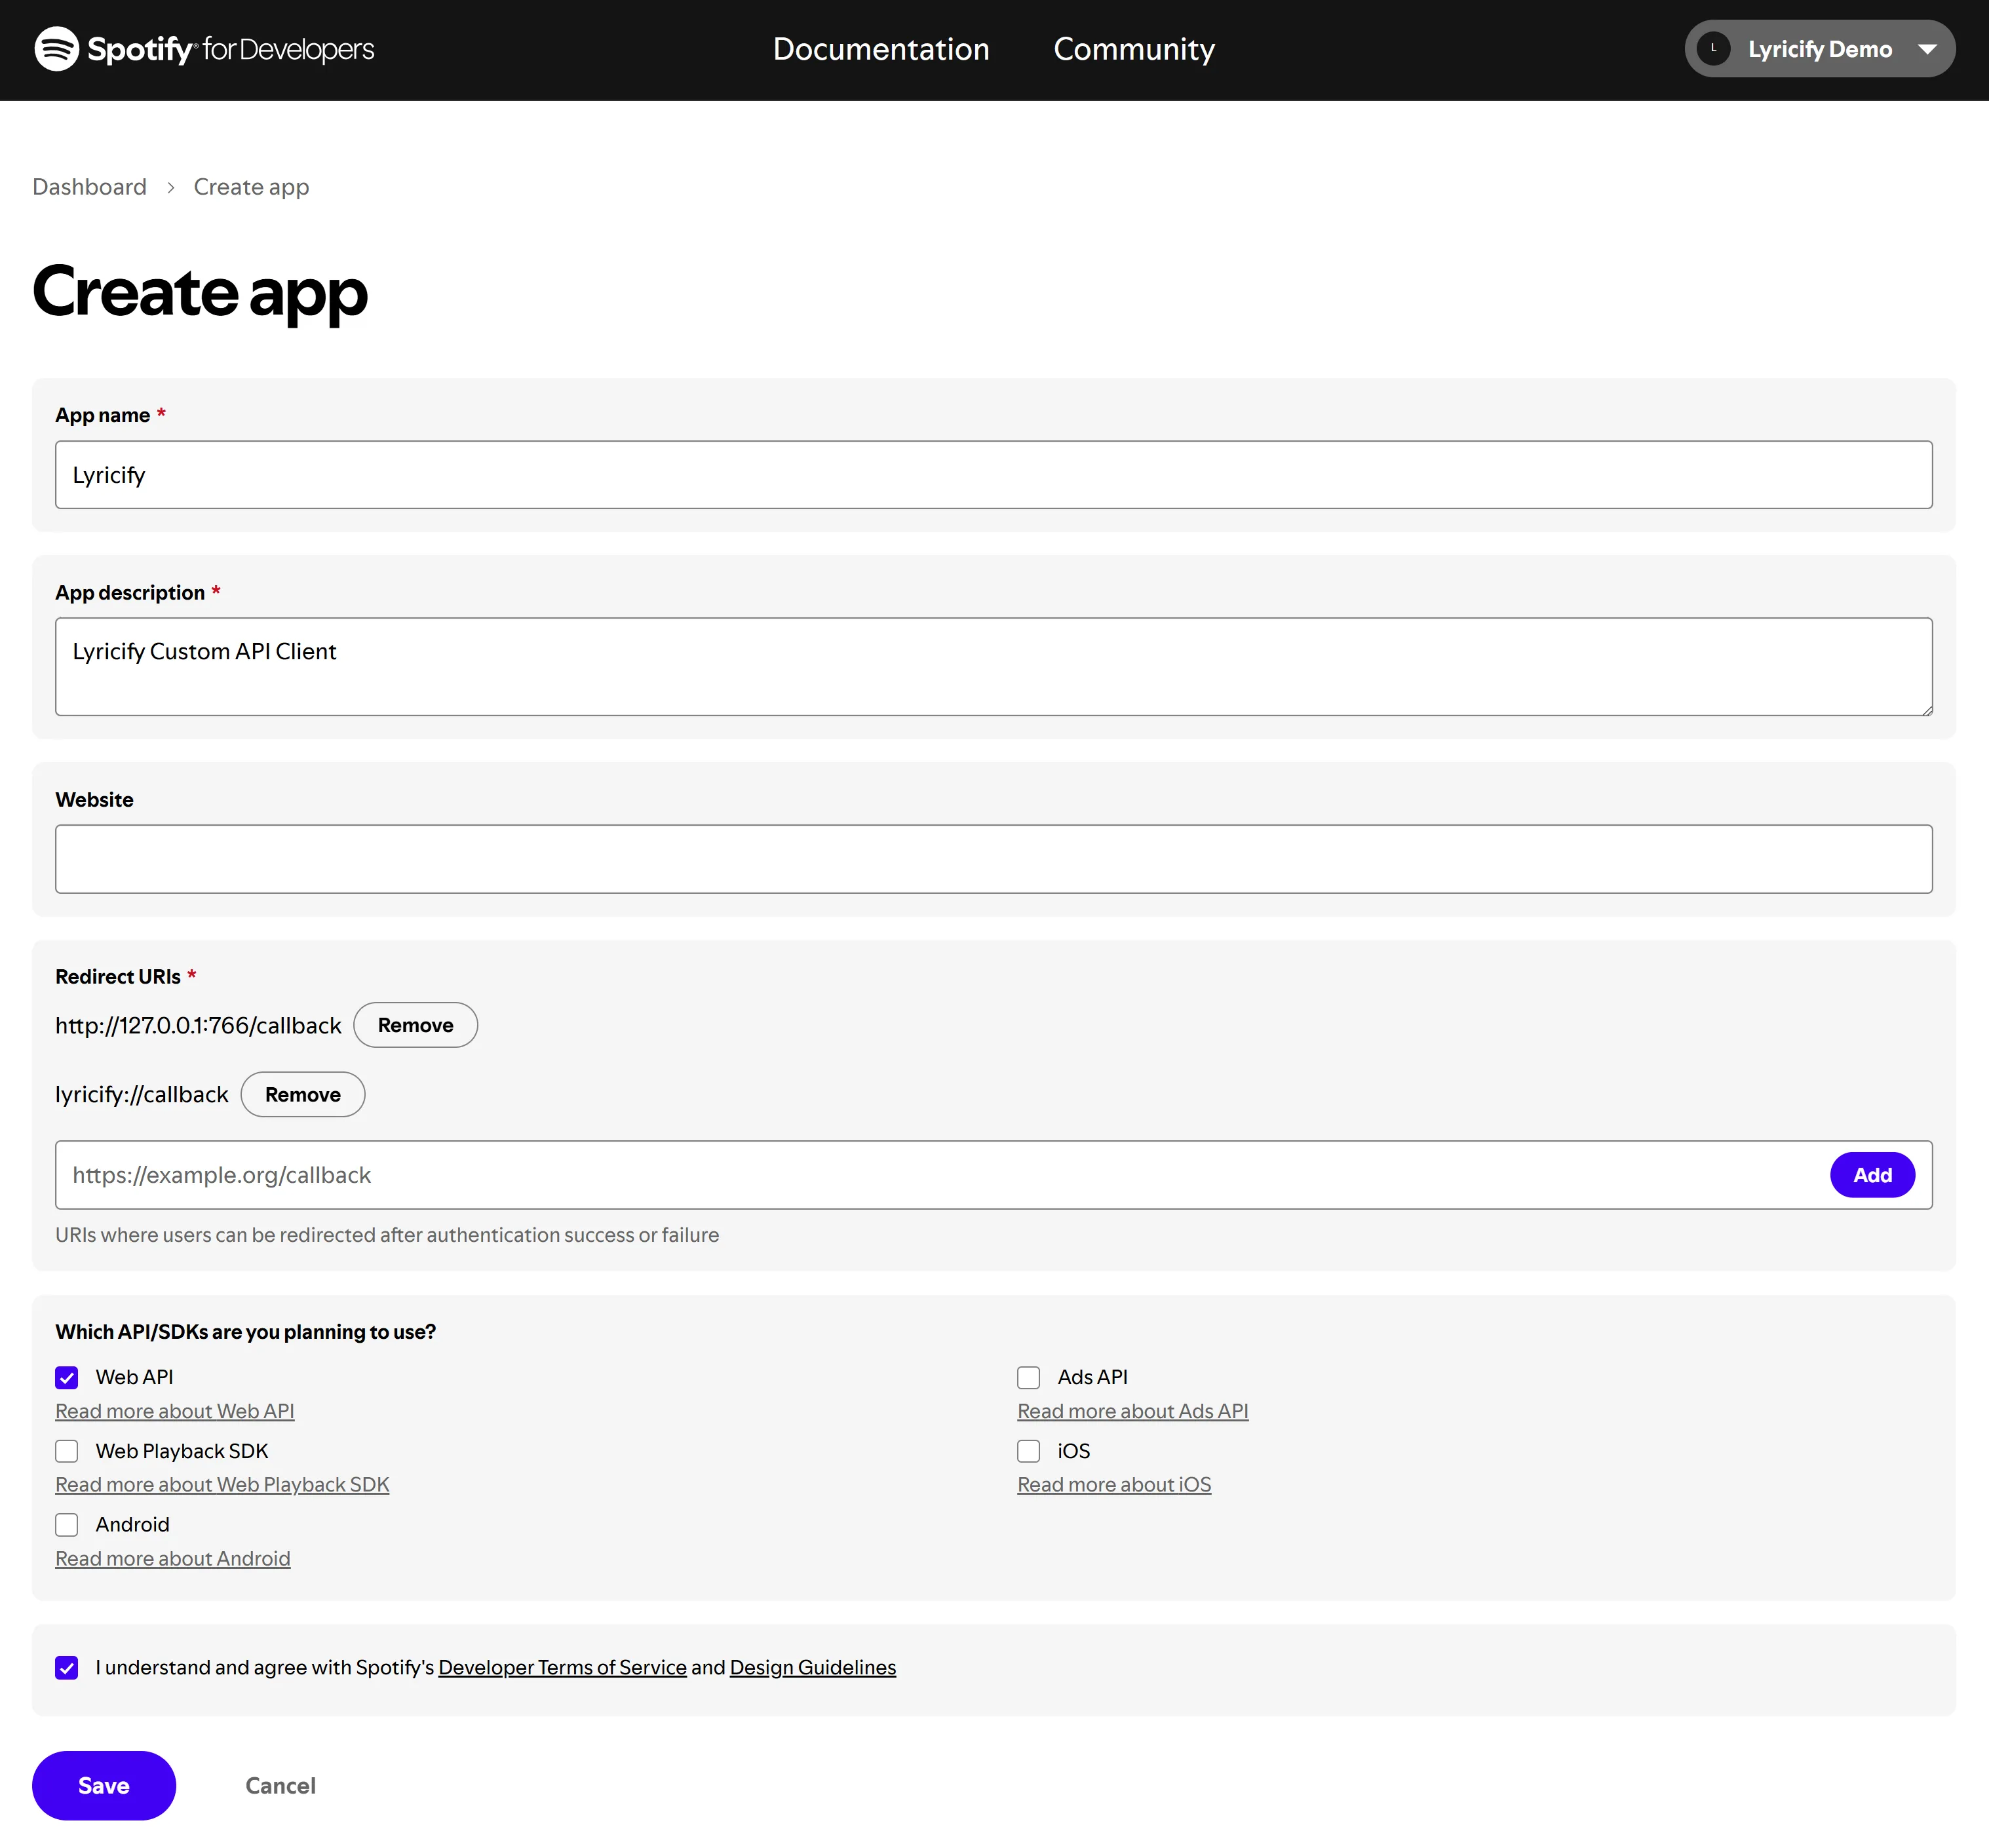
- Fill Create app page with these:
- App name: Lyricify
- App description: Lyricify Custom API Client
- Website: (Leave it empty)
- Redirect URI:
- http://127.0.0.1:766/callback
- lyricify://callback
- Check
Web APIinWhich API/SDKs are you planning to use?section;
CheckI understand and agree with Spotify's Developer Terms of Service and Design Guidelines;
ClickSave.
- Now you can see your Client ID,Click
View client secretto show the Client secret.Client IDandClient Secretare needed in future steps.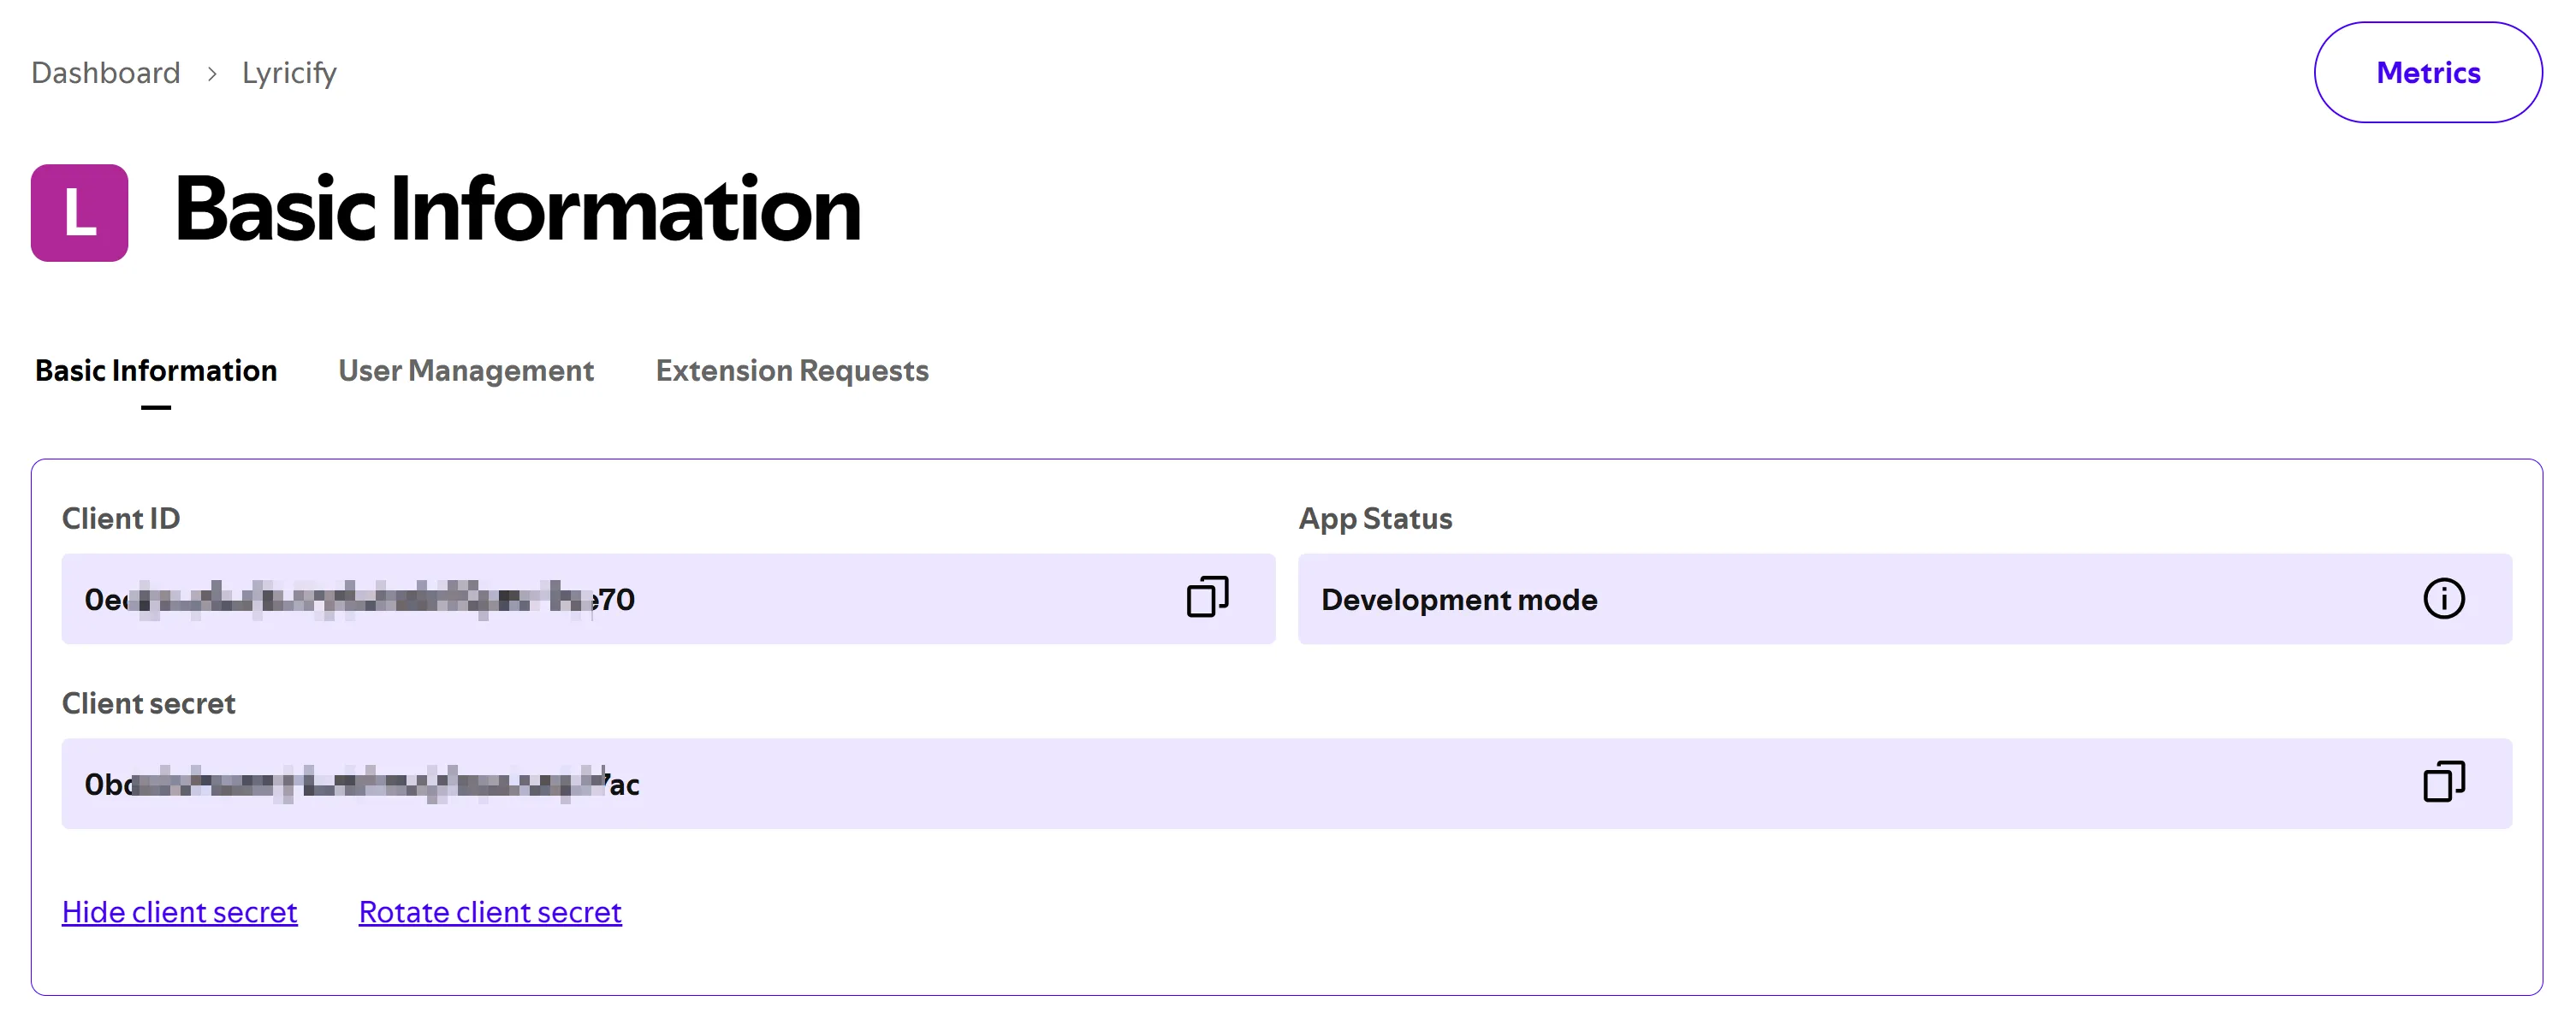
Works on Lyricify Mobile
Section titled “Works on Lyricify Mobile”- If you have already logged Spotify in Lyricify Mobile, then you will need to click Cancel button at open.
- Enter
Client IDandClient Secretyou previously obtained in welcome page’sCustom API Clientpart. - Click Login (Get Token), finish the login and authorization, and you are good to go.
The steps above apply when you create and configure your own Client.
If you do not have Spotify Premium yourself, but can borrow a usable Client created by a friend, you may use the alternative method below.
Borrowing a Friend’s Client Information
Section titled “Borrowing a Friend’s Client Information”If you do not have Spotify Premium yourself, but your friend has Spotify Premium, you may use a Client created under your friend’s account.
Under Spotify’s current rules, one Client can be used by up to five users.
Actions to be completed by your friend
Section titled “Actions to be completed by your friend”- Your friend first creates the Client by following the preparation steps above.
- Your friend opens Spotify Developer Dashboard, enters the corresponding Client, and opens the
User Managementpage. - Your friend fills in your Spotify account information in
Full NameandEmail, then clicksAdd user.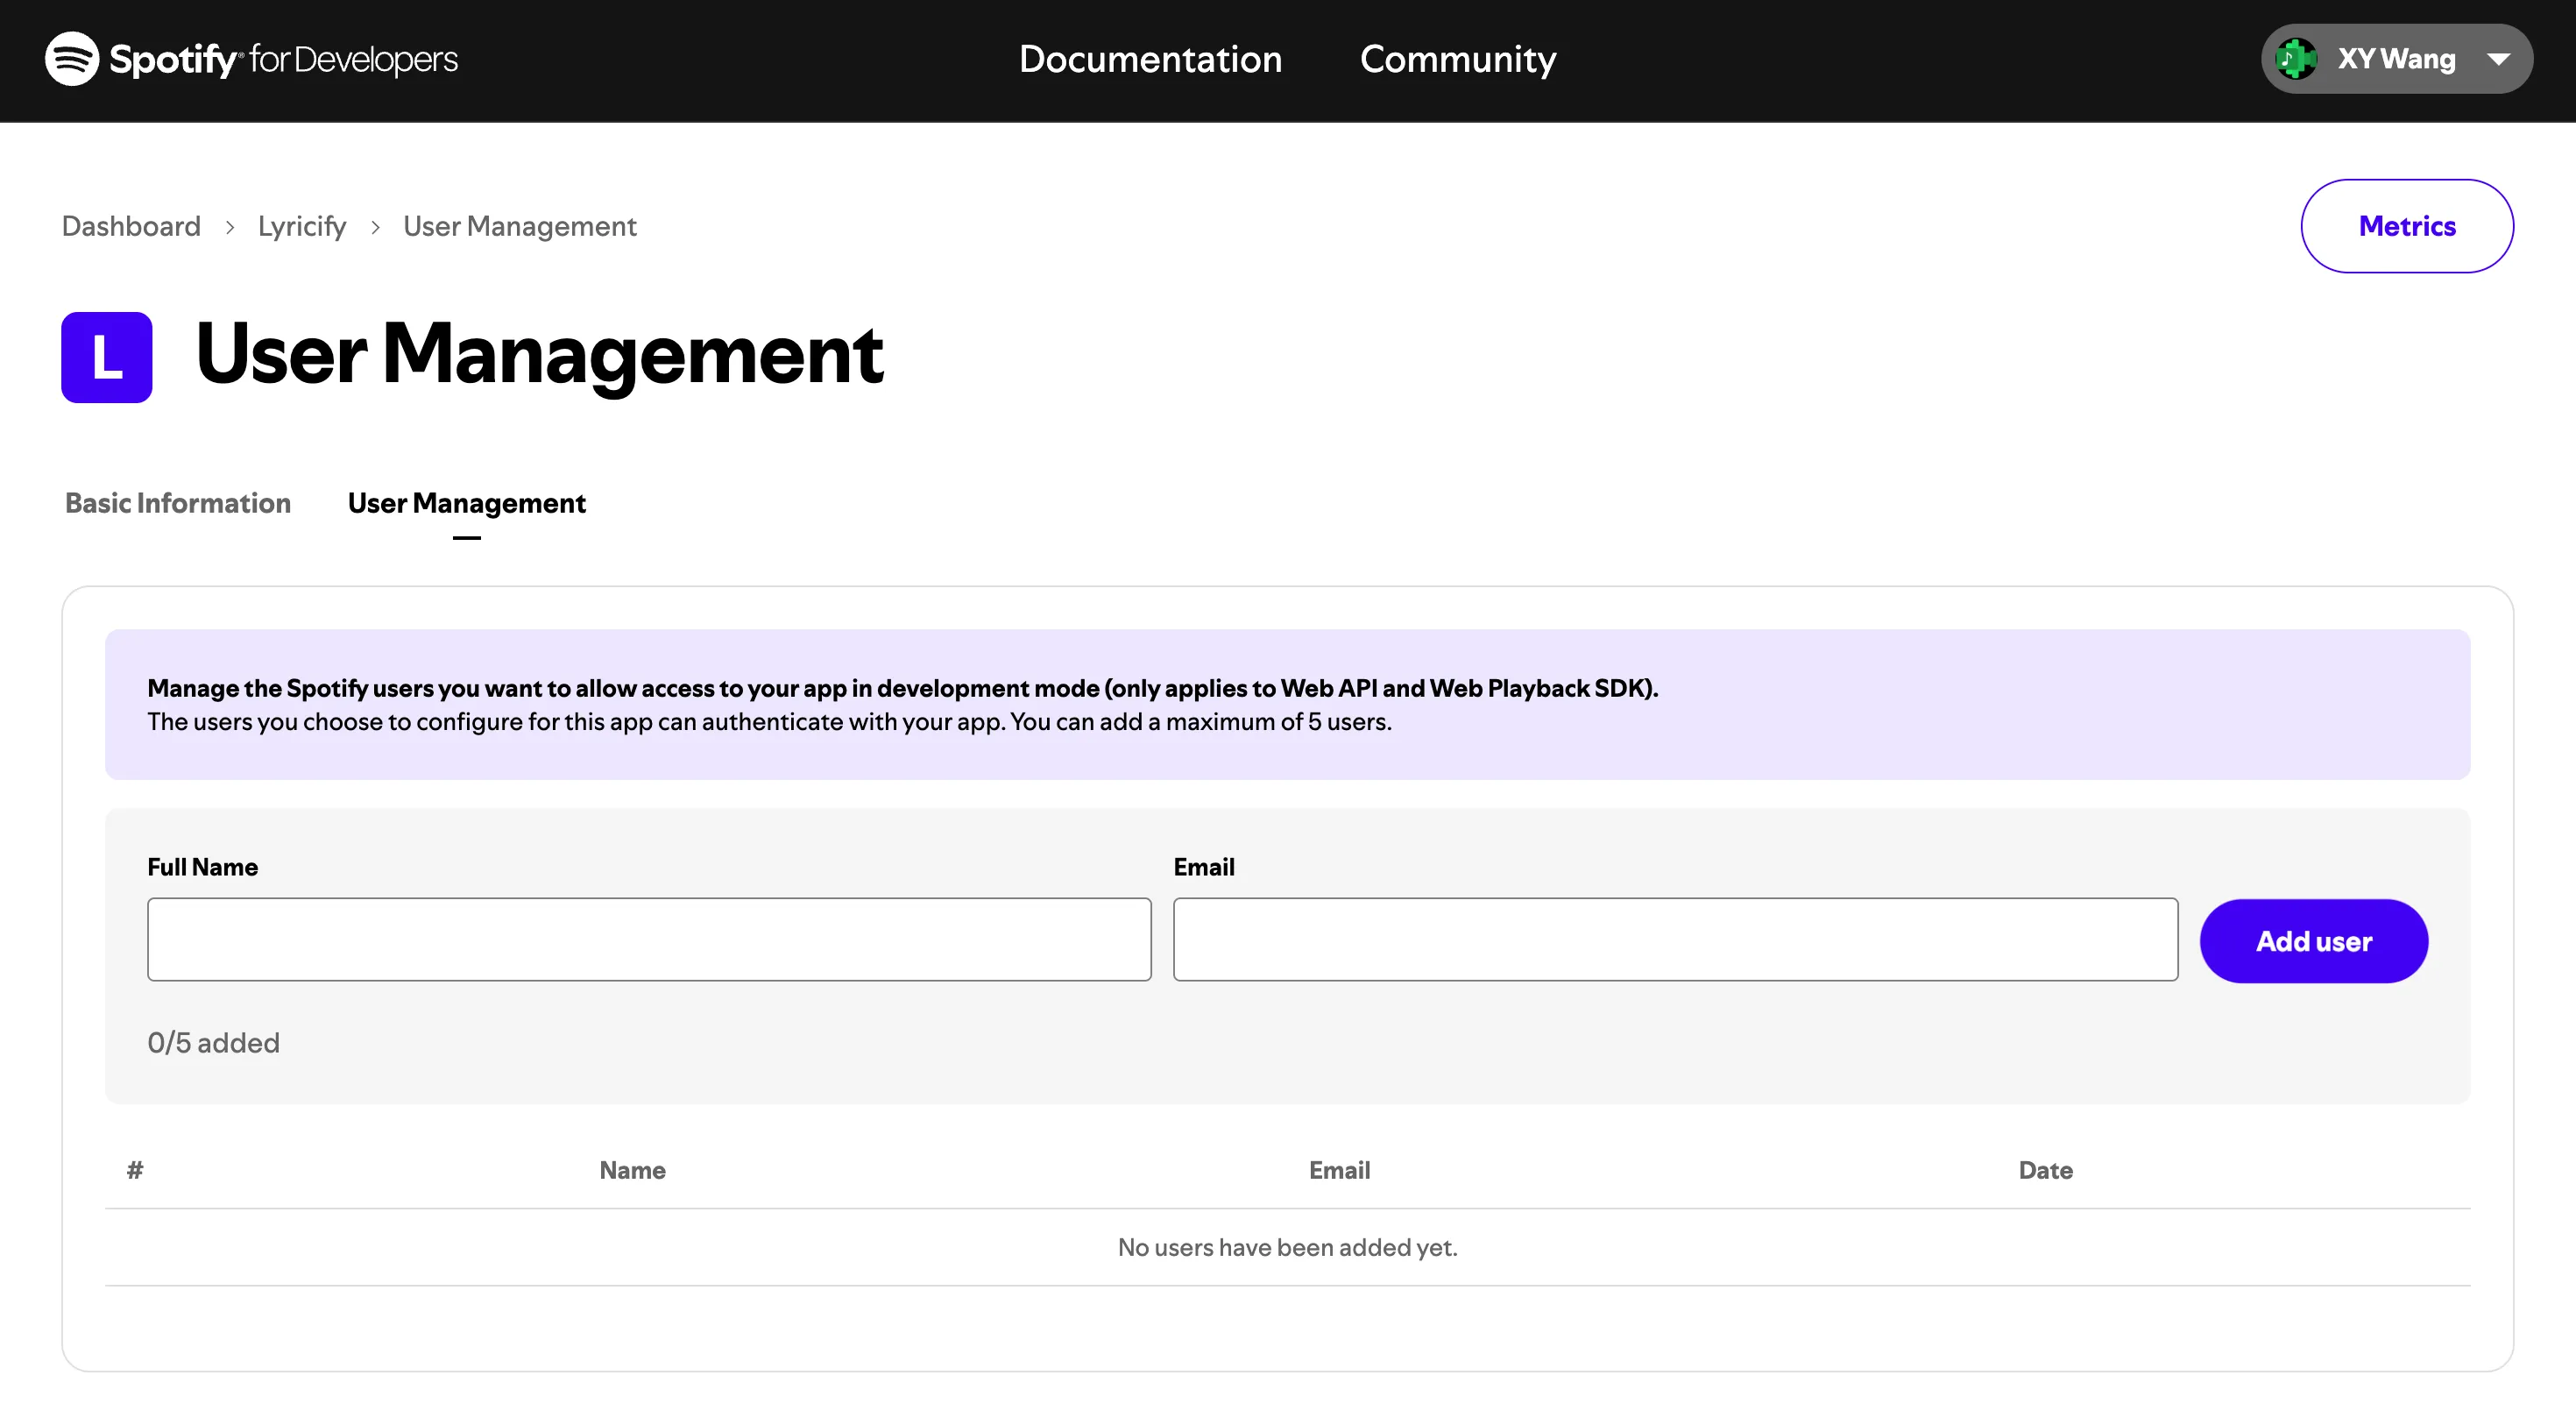
- After that, your friend sends you the
Client IDandClient Secret.
Actions to be completed by you
Section titled “Actions to be completed by you”- In Lyricify Mobile, open the
Custom API Clientsection by following the steps above. - Enter the
Client IDandClient Secretprovided by your friend. - Complete the login and authorization process.
Common Issues
Section titled “Common Issues”Error during authorization: INVALID_CLIENT: Invalid redirect URI
Section titled “Error during authorization: INVALID_CLIENT: Invalid redirect URI”Please check if the Redirect URI is entered correctly. Make sure it includes both lyricify://callback and http://127.0.0.1:766/callback, and not https://127.0.0.1:766/callback.
If you’re using an Android or iOS device, be sure to include lyricify://callback in the Redirect URI.
Please ensure you are using Lyricify Mobile version 1.5.0 or later and are using redirect to browser login. Due to Spotify’s adjustments, embedded web login is temporarily unavailable and will be restored in the next update.
Important Note
Section titled “Important Note”If you created and configured your custom API Client before April 9, 2025, please make sure to update your app settings in the Spotify Developer Dashboard. Due to recent changes in Spotify’s redirect URI validation, URIs using localhost are no longer accepted. You need to replace the original:
http://localhost:766/callbackwith:
http://127.0.0.1:766/callbackOpen Spotify Developer Dashboard, go to the settings page of the corresponding Client, and add http://127.0.0.1:766/callback under the Redirect URIs section. Once updated, your custom API Client should work properly during authorization.